WhatStay

WhatStay - WhatsApp AI Assistant for Hotel Booking Automation (SaaS)

Created on: 25th May, 2026

By: KreativDev


Support:
Please visit this page https://kreativdev.freshdesk.com & click on 'New Support Ticket' to create a support ticket.
You can also login & then create a 'New Support Ticket'.
We will respond to your ticket once we are available for support.


Feature Suggestions:
If you have any Feature Suggestions, then please feel free to mail us at kreativdev.envato@gmail.com. We will be very happy to note your feature

About

WhatStay is a WhatsApp AI Assistant for hotel booking automation, where each hotel owner can subscribe to a plan and get their own dashboard. Through this dashboard, hotel owners can connect and manage multiple WhatsApp numbers according to their subscribed pricing plan limits. The WhatsApp AI Assistant helps hotel owners fully automate guest communication, booking requests, reservation management, and payment collection.

The AI Assistant can communicate with hotel guests automatically on WhatsApp, collect booking information such as check-in/check-out dates, number of guests, room preferences, and other booking details (which can be specified by hotel owners from the dashboard), then automatically store the booking request in the hotel dashboard.

Hotel owners can also train the AI Assistant using document files containing hotel information, policies, FAQs, etc... This allows the AI Assistant to answer common guest questions automatically 24/7.

If guests want to view room details, the AI Assistant can also share room detail page links with them, where they can view room photos, videos, amenities, pricing, and other room-related information.

If the AI Assistant cannot answer a question, it can ask the guest to contact the hotel directly by sharing the hotel’s phone number and email address with the guest.

After collecting booking details, the system automatically creates a booking request inside the dashboard and notifies the guest on WhatsApp. Hotel staff can then send payment links directly to guests through WhatsApp with a single click from the dashboard.

Once payment is completed, guests automatically receive booking confirmation messages on WhatsApp. After that, hotel staff can also manage room assignments, booking statuses, stay statuses, and guest reservations from the dashboard.

Additionally, hotel owners can add multiple staff members to their dashboard. The system includes a staff role and permission feature that allows hotel owners to create different roles with custom permissions and assign staff members accordingly. These staff members can access the dashboard on behalf of the hotel owner and manage rooms, bookings, reservations, and other hotel operations based on their assigned permissions.

The system also includes hotel service settings and a complete room management system. Hotel owners can manage rooms, set check-in/check-out times, enable or disable booking cancellations, configure cancellation deadlines before check-in, and set refund percentages for cancellations. They can also manage coupons, fees, taxes, amenities, and room categories directly from the dashboard. Additionally, hotel owners can manage room bookings by statuses such as pending, approved, cancelled, active, and running bookings. They can also manage check-ins, delayed check-ins, check-outs, delayed check-outs, today’s booked rooms, and room refund requests from the dashboard.

The system also includes support ticket management, WhatsApp notification template management, Mail templates, 19 online and unlimited offline payment gateway support, multilingual and RTL supported system, additional AI token purchase system, advanced keyword builder system & more.

Installation

This item is built with Laravel Framework (Version - 11.x)

Server Requirements:

  • PHP 8.3
  • Ctype PHP Extension
  • cURL PHP Extension
  • DOM PHP Extension
  • Fileinfo PHP Extension
  • Filter PHP Extension
  • Hash PHP Extension
  • Mbstring PHP Extension
  • OpenSSL PHP Extension
  • PCRE PHP Extensio
  • PDO PHP Extension
  • Session PHP Extension
  • Tokenizer PHP Extension
  • XML PHP Extension
  • Imagick PHP Extension

Installation Steps:


  • Step 1 (Collect Installable File):

  • After you purchase WhatStay, you will get a zip file.
    After Extracting the zip file you will get an installable.zip file.

  • Step 2 (Upload Installable File):

  • Upload installable.zip in your server & extract it.

    Once extraction is completed , delete the installable.zip file from server.

  • Step 3 (Welcome Page):


  • After you enter your website URL in your browser you will see a welcome page of WhatStay Installer. Then click on Check Requirements Button.

  • Step 4 (Server Requirements):


  • Next, you will be shown a list of extensions required to run this software. If all the extensions have green check icon, then click on Check Permissions button. If any extension has red cross icon, then you need to enable / install the extension in your server first. You might need to contact hosting support for that.

  • Step 5 (Folder Permissions):


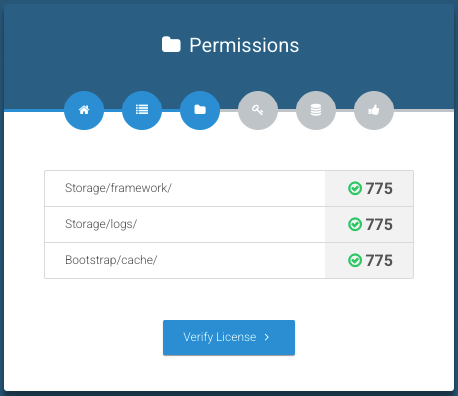
  • In this step, you will be shown a list of folder locations & their required permissions. If all the folder has green check icon, then click on Verify License button. If any folder has red exclamation icon (like the above image), then you need to change the permission of the folder first.
    Let us show you how to change folder permission of 'storage/framework/' as an example
    • First, navigate to storage folder in your server
    • Right click on the framework folder & choose Change Permissions from the dropdown
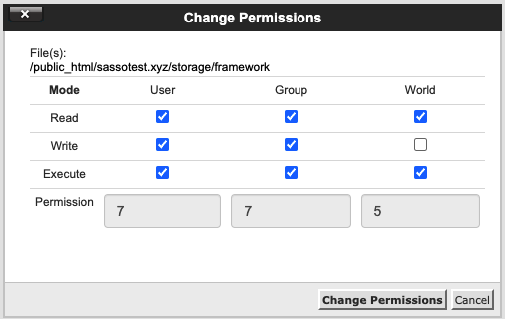
    • Then, you will be shown a popup, change the permission to 775 in the popup
    • Thats it, you have changed the permission to 775 for 'storage/framework/'. Now repeat the same procedures for the other folders of the list shown in Permissions Step in WhatStay Installation Wizard
    • Then, go back to installation wizard & refresh the page.You will see all the folders are checked with green icon


  • Step 6 (License Verifications):


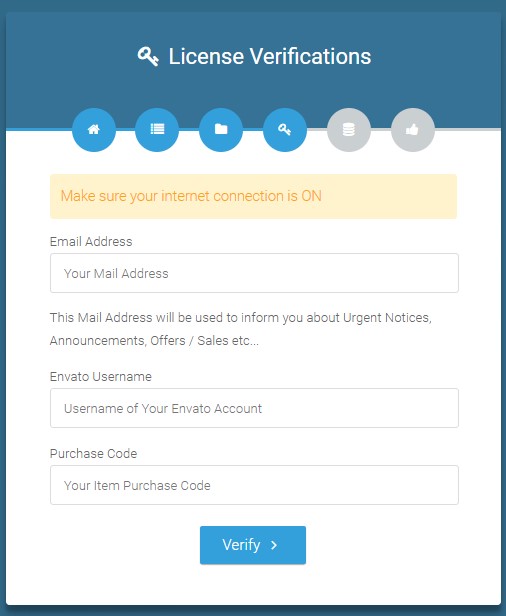
  • In this step, you have to put your primary (which you use all the time) email address, Envato Username & Item purchase code. Now click on Verify button.
    How to get item purchase code: Click here to see a short guide
    NB: You must turn on your internet connection for this step if is off.

  • Step 7 (Environment & Database Setup):


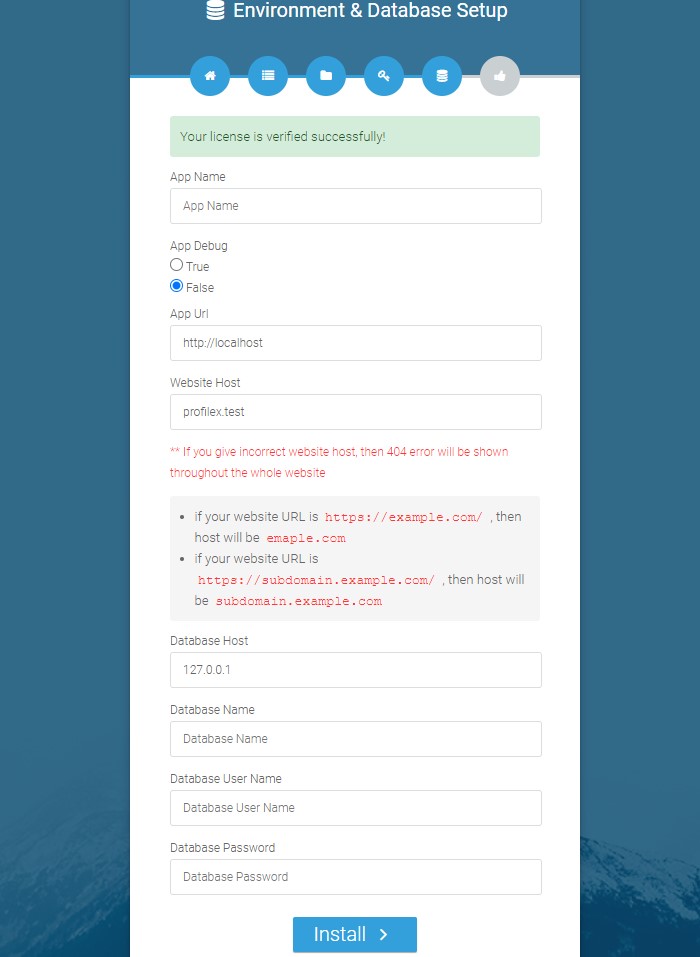
  • In this step, you have to give some of your environment & Database info.
    • App Name: You app name
    • App Debug:
      True - If you want to see the error message if any error occurs in the website & False - if you dont want to show the error mesage. I would recommend you to keep it false, as database credentials will also be shown if you keep it true
    • App URL: Enter your website URL here.
    • Website Host: This will automatically be detected & prefilled by the installer. But if the website host is detected wrong by installer, then please correct it. If the website host is incorrect , then you will see 404 Page thoughout the website after installation.
      How to get website host:
      • if your website URL is https://example.com/ , then host will be emaple.com
      How to change website host after installation (skip this step while installing for the first time):
      • Go to '.env' file
      • search for WEBSITE_HOST & change the red marked part (shown in screenshot)
      • Screenshot:
    • Then put all your database information - Database Host, Database Name, Database Username, Database Password
    Now, click on Install button.

  • Step 8 (Installation Success):


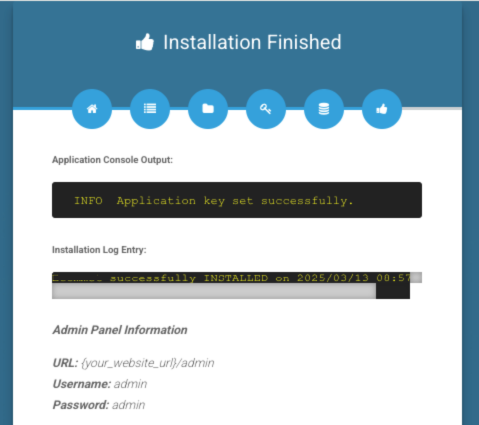
  • In this step, you will be shown an installation success message. Then click on Click here to exit button at the very bottom of this page & You will be redirected to the installed website.
  • Step 9 (Delete Installer Folder):


  • Now you can delete the installer folder from the public folder of the project

Cron Job:

πŸ‘‰ Cron Job is needed to send mails to customers when their subscription / membership is about to expire / expired.
Please follow these below steps to add the cron job

1. Login to your hosting & go to 'Cron Jobs' menu
2. Go to 'Add New Cron Job' section
3. Select 'Once Per Day(0 0 * * *)' option from the dropdown of 'Common Settings' [Follow red marked part of the above image]
4. Add
wget {your_website_url}/cron/subcheck
- this command in 'Command' input field [Follow red marked part of the above image]. {your_website_url} will be replace with your website url .
5. Now click on 'Add New Cron Job' to add your cron job.

Package Management:

πŸ‘‰ Package Management is used to create, manage and control subscription packages for hotel owners. Admin can create different types of packages such as monthly, yearly and lifetime packages. Admin can also set package price, status, features and usage limits for each package.


Package Features:

πŸ‘‰ This feature helps Admin control which package features are publicly visible in the system. These features are managed from Packages > Package Features

Only the selected package features will be displayed in:

  • Frontend Pricing Section
  • Hotel Owner Package List

πŸ‘‰ If a feature is not selected from Package Features, then that feature will not be shown anywhere in package display sections.


Packages:

πŸ‘‰ Admin can create and manage subscription packages from Packages > Packages.

If the package price is set to 0, then the package will appear as a free package.

To make any limit unlimited, enter 999999 in the corresponding limit field.

Inactive packages will not be available for hotel owners to purchase.


Package Settings:

πŸ‘‰ Admin can manage package reminder settings from Packages > Settings.

πŸ‘‰ The Remind Before (Days) field is used to set how many days before the subscription expiry date the hotel owner will receive a reminder email.

For example, if the value is set to 3, then the hotel owner will receive an email notification 3 days before their package subscription expires.

Admin Login Details:

You can manage each and everything of this system from this Admin panel such as Mail settings, Contents, Pages, Packages, Payment Logs, Payment Gateways, Roles / Permissions, Registered Users, Website Color etc...
Admin URL: your_website_url/admin
Username: admin
Password: admin

Admin Profile:

Admin can change username & some details from here (screenshot):

Admin Password:

Admin can also change password from here (screenshot):

AI Credits:

AI Credits are used by hotel owners for AI-based features such as automated replies, room suggestions, booking flow, guest question answers, and booking summary generation.

Hotel owners can purchase additional AI credits when they need more usage. The purchase price will be calculated based on the credit rate configured by Admin.

Price Settings:
AI Credit Price Settings

πŸ‘‰ Admin can manage AI credit pricing from AI Credits > Price Settings.

πŸ‘‰ This section allows Admin to define how much hotel owners will be charged when they purchase additional AI credits or tokens.

πŸ‘‰ The currently selected AI provider, such as Gemini or OpenAI, determines which credit rate will be used.

πŸ‘‰ When hotel owners need more AI credits for automated replies, booking flow, room suggestions, or AI-generated responses, they can purchase extra credits based on this configured pricing.

πŸ‘‰ After updating the credit rate, all future AI credit purchases and manual top-ups will follow the updated pricing automatically.

Credit Purchase Requests:
AI Credit Purchase Requests

πŸ‘‰ Admin can view all additional AI credit purchase histories from AI Credits > Credit Purchase Requests.

πŸ‘‰ When hotel owners purchase extra AI credits, the purchase records will be listed here with username, credits, paid amount, gateway, payment method, date, and status.

πŸ‘‰ If a hotel owner purchases AI credits using an online payment gateway, the request will be approved automatically after successful payment.

πŸ‘‰ If a hotel owner purchases AI credits using an offline payment method, Admin needs to verify the payment manually and approve the request from this section.

πŸ‘‰ After approval, the purchased AI credits will be added to the hotel owner's account.

AI Credit Usage Overview:

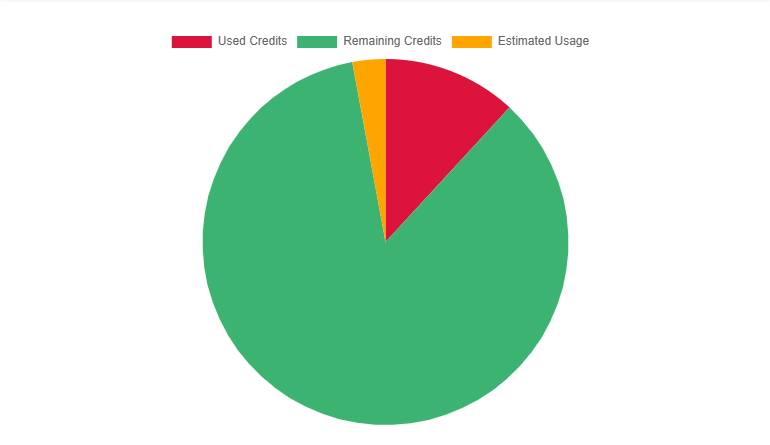
πŸ‘‰ This section is displayed in the Admin Dashboard and shows the overall AI token usage summary of the system.


πŸ‘‰ The chart provides a visual overview of total AI credits, used credits and already distributed tokens.

  • Remaining Credits: Displays the total available AI credits that Admin can still distribute among hotel owners.
  • Used Credits: Displays the total AI credits already consumed by hotel owners.
  • Estimated Usage: Displays the total AI credits already distributed to hotel owners but not fully used yet. These credits may be consumed gradually by hotel owners.

User Account Status:

πŸ‘‰ Admin can manage and monitor hotel owner account statuses from Users Management > Registered Users.


πŸ‘‰ This section allows Admin to control important account related statuses for hotel owners.

  • Email Status: Indicates whether the hotel owner has verified their email address or not.
  • Account: Controls whether the hotel owner's account is active or deactivated.

πŸ‘‰ If the account status is set to Inactive, the hotel owner may lose access to their dashboard and system features.

Package Add/Edit:

πŸ‘‰ Admin can manually add, change or remove packages for hotel owners from Users Management > Registered Users > Details.


User Package Details:

πŸ‘‰ In the User Details section, Admin can view the hotel owner's current package information, package expiry date and package status.


Add Next Package:

πŸ‘‰ Admin can click the Add Package button to assign a new package for the hotel owner.

πŸ‘‰ The selected package will be assigned as the user's next package.


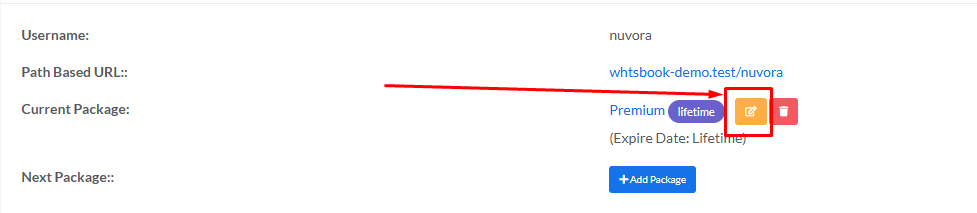
Change Current Package:

πŸ‘‰ Admin can change the user's currently active package by clicking the edit button beside the current package.

πŸ‘‰ From the popup form, Admin can select a new package and payment method, then update the user's active package.


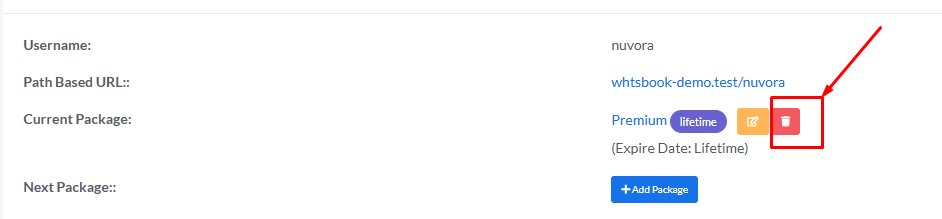
Remove Current Package:

πŸ‘‰ Admin can remove the currently active package of a hotel owner by clicking the delete button beside the package.

πŸ‘‰ After removing the package, the hotel owner will lose access to the features and limits provided by that package.

AI Credit Topups:

πŸ‘‰ Admin can manually recharge AI credits for hotel owners from Users Management > Registered Users > AI Credit Topups.


AI Credit Topups:

πŸ‘‰ Admin can access the AI credit Topups by selecting AI Credit Topups from the action dropdown of a registered user.

πŸ‘‰ Recharge records created manually by Admin will appear with Admin Recharge as the payment method.


Add Credits:

πŸ‘‰ Admin can manually add AI credits for hotel owners by clicking the Add Credits button.

πŸ‘‰ After submitting the form, the specified AI credits will be added instantly to the hotel owner's account.

Support Tickets:


All Tickets:

πŸ‘‰ In this section, Admin can view all submitted support tickets along with ticket number, username, email, subject, current status and action options.

πŸ‘‰ Tickets can have different statuses such as:

  • Pending - Waiting for Admin response.
  • Closed - Ticket issue has been resolved and closed.


Ticket Conversations & Replies:

πŸ‘‰ Admin can reply directly to the ticket using the reply editor shown at the bottom of the page.

πŸ‘‰ Once the issue is solved, Admin can click the Close Ticket button to mark the ticket as completed.

Website Color:

πŸ‘‰ Admin can change website's base color from 'Settings > General Settings' of Admin Dashboard:

Additional Pages:

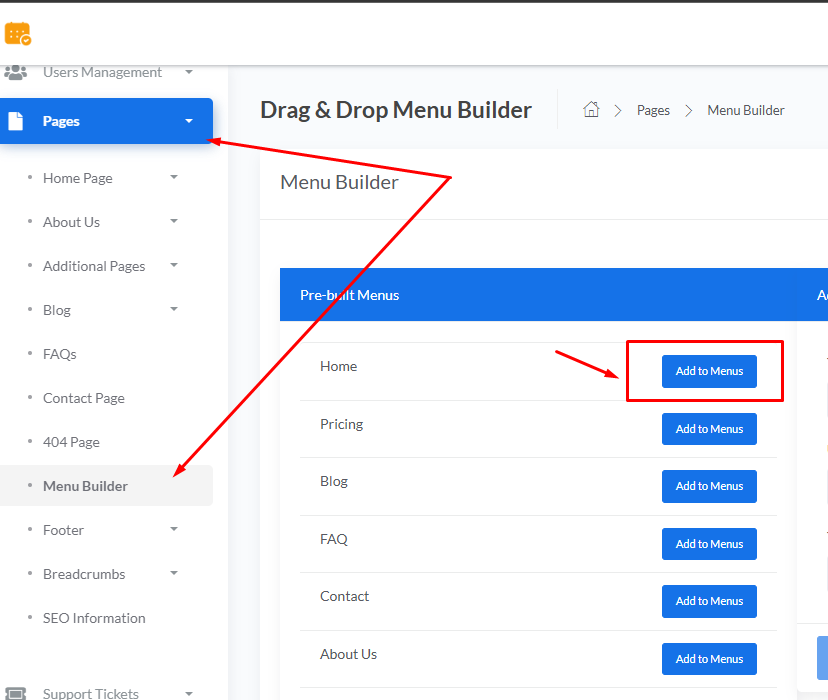
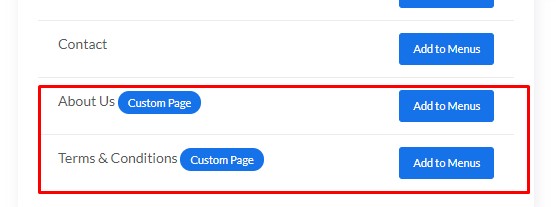
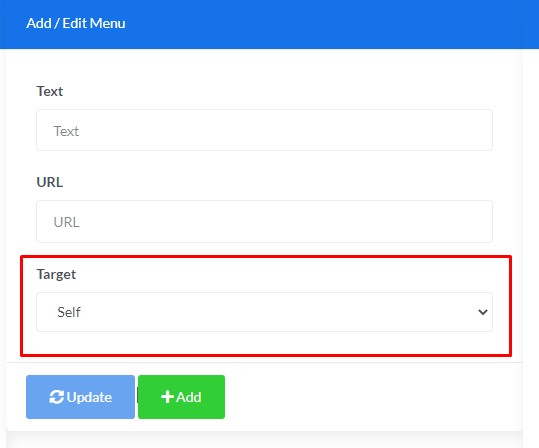
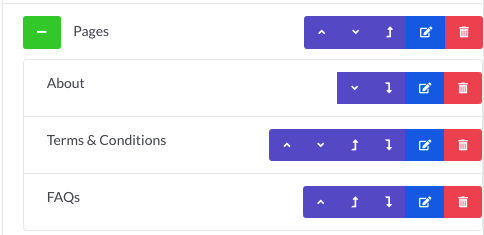
πŸ‘‰ Admin can create pages from 'Pages > Additional Pages > Add Page' of Admin Dashboard & add them in website menu using Drag & Drop Menu Builder

Email Settings:

Mail From Admin:

Admin can setup SMTP to set a mail from which all the mails will be sent to customers via this website. Admin can setup SMTP details in Settings > Email Settings > Mail From Admin
Some Important Notes regarding SMTP
  • Sometimes SSL encryption has some issues in some server as PHP is very strict now a days to check SSL. In that case, please choose TLS
  • If you choose TLS, then dont forget to change the SMTP Port accordingly (in most cases, it is 587. But on your server it could be different)
  • If you still face issues , then please contact hosting support & show them the SMTP details you are using in Admin Panel's SMTP form. It mostly depends on server so SMTP issue can only be solved by hosting support.

Mail to Admin:

Admin can setup this mail from which will be used to recieve mails from this website. Admin can this mail in Settings > Email Settings > Mail To Admin
Some Important Notes:
  • If you face any issue (like - mail not coming from contact form to the setup mail), then please create a ticket here: https://kreativdev.freshdesk.com/
    We will replace the PHPMailer code with mail()
  • If it still does not work, then you will need to contact hosting support & tell them PHP mail() function not working. They will be able to solve it. Mail mostly depends on server.

Currency Settings:

Admin can set currency in Settings > General Settings
Admin must set the currency rate based on USD

Payment Gateway Settings:

Online Gateways

All the online payment gateway's credentials can be set in Settings > Payment Gateways > Online Gateways

Admin can also set the payment gateways in test / live mode

Offline Gateways

Admin can create offline gateways to receive booking payments

Admin can setup instructions & description (optional) which will be shown to customers in checkout page

Admin can also enable / disable attachement status

  • If attachement enabled, then customer will have to upload the image of their transaction during checkout
  • If attachement disabled, then customer the attachement field wont be shown to customers during checkout

Language Management:

πŸ‘‰ Admin can create unlimited language & translate the website for that language from Settings > Languages of Admin Panel

After a adding a language, Admin need to click on Edit Keyword button of that language to translate all the keywords of the websites & dashboards to that language

πŸ‘‰ Admin can even change the keywords of English Language too

πŸ‘‰ The Admin has also full control over translating all keywords used in both the Tenant Dashboard and the Tenant’s frontend website. Once a tenant registers, their dashboard and website automatically inherit all languages and translations previously added by the Admin. These translations are immediately available for use in the tenant's environment. After registration, the tenant has the ability to modify the Admin-provided translations, but only for their own websiteβ€”translations used in the Tenant Dashboard remain under the Admin’s control and cannot be changed by the tenant. Additionally, tenants can choose to delete any inherited language if they no longer wish to use it on their website.

Announcement Popup:

WhatStay provides 7 types of popups during creating a popup

Admin also active / deactive any popup.

Multiple popups can be shown in website. Popups will be visible accroding to serial number (set by Admin)

Maintenance Mode:

πŸ‘‰ Admin can set the website under Maintenance Mode from Settings > Maintenance Mode

In maintenance mode Admin can always access the Admin Panel

To access the frontend Admin can setup a secret path (avoid using any special characters in it, use plain letter & number combination)

πŸ‘‰ Anyone who knows the secret path can access the website by typing {website_url}/{secret_path} in browser

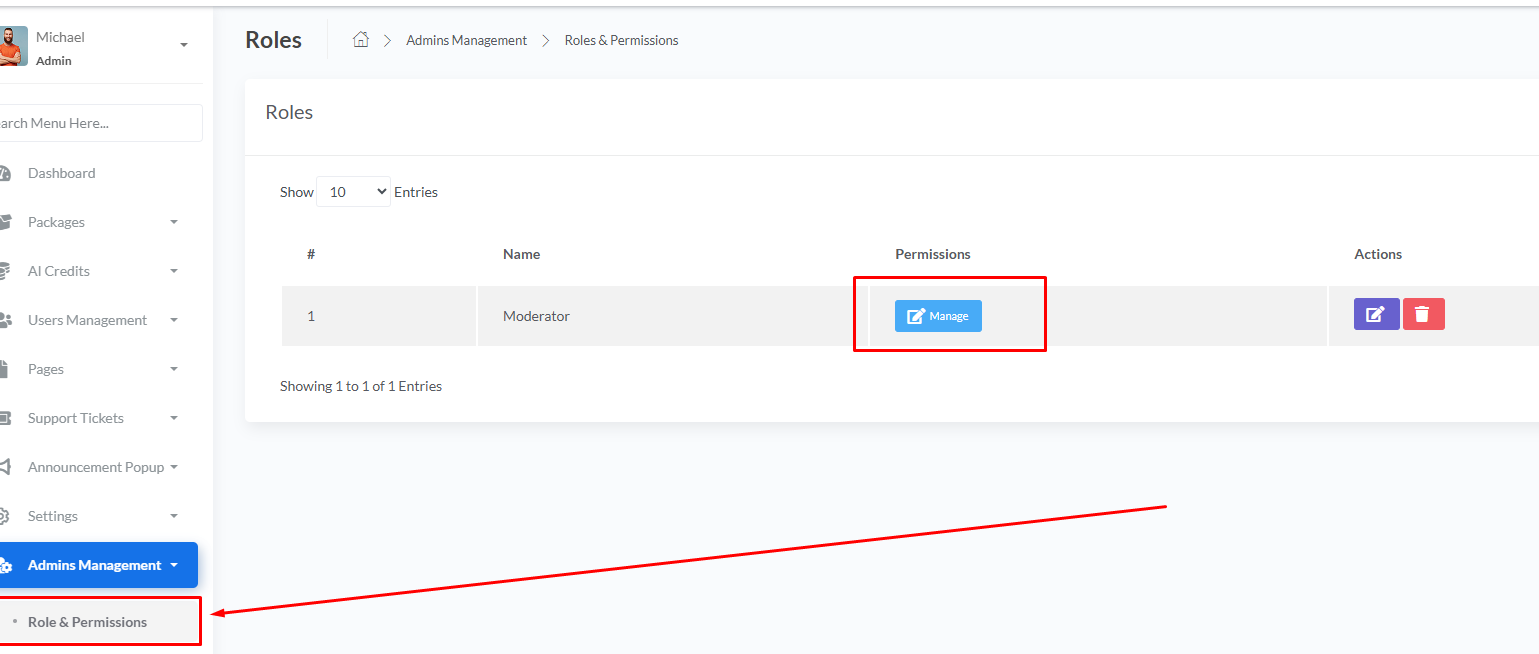
Admin / Roles & Permissions:

πŸ‘‰ Owner can create roles from Admins Management > Roles & Permissions & can assign permission clicking on manage button of that role

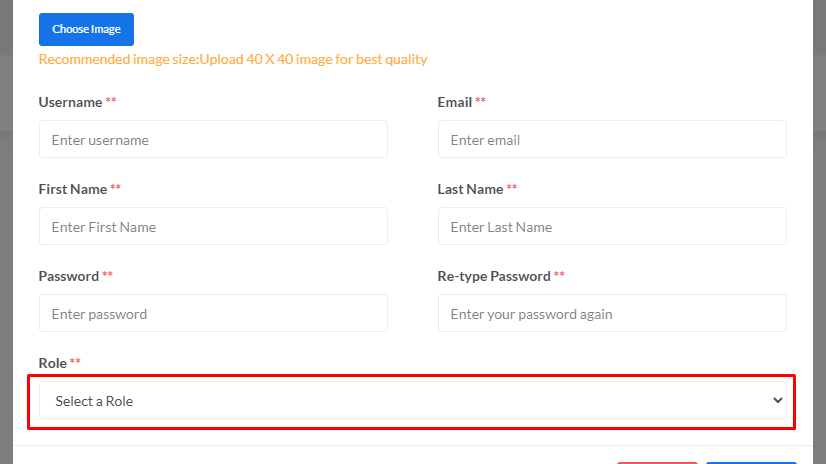
Owner can create a Admin & assign a role to that Admin

Developer Support

If you need support
Please visit this page https://kreativdev.freshdesk.com & click on 'New Support Ticket' to create a support ticket.
You can also login & then create a 'New Support Ticket'.
We will respond to your ticket once we are available for support.

KreativDev